Straightening a photo in Photoshop is a very easy process. This tutorial will show you how you can quickly and easily straighten an image in Photoshop. If you are a photographer and don’t use a tripod, you will obviously find some of your photos crocked. A crocked photo can ruin your best shots. But clipping path solve provides Photoshop solution to straighten crooked images. So now let’s see how you can straighten a photo in Photoshop quickly.

1.The Ruler tool
The ruler tool is the best solution to straighten a photo in Photoshop. If you use a ruler tool, Photoshop will do most of the straightening work for you. You don’t have to guess the correct position of your subject because you can easily find the exact position of your subject. The location of the ruler tool is under the eyedropper tool. You have to click and hold to select the option.

2.Using the ruler tool
Select something in your image which should be made straight, either horizontally or vertically. After that, you have to click, hold and drag along the edge of the uneven surface of your image with the Ruler tool. By doing this, Photoshop will learn how crooked the object is. After that, you have to release the mouse button when you reach the photo’s other end. And this process will make a thin line on the surface from the first point to the last point. Photoshop will use the angle of the line to determine the perfect rotation to straighten the photo.
In the top options bar, you will see the line angle drawn and displayed on the right of the letter A. Photoshop will rotate the image according to the angle to straighten the image.

3.Selecting image rotation and arbitrary
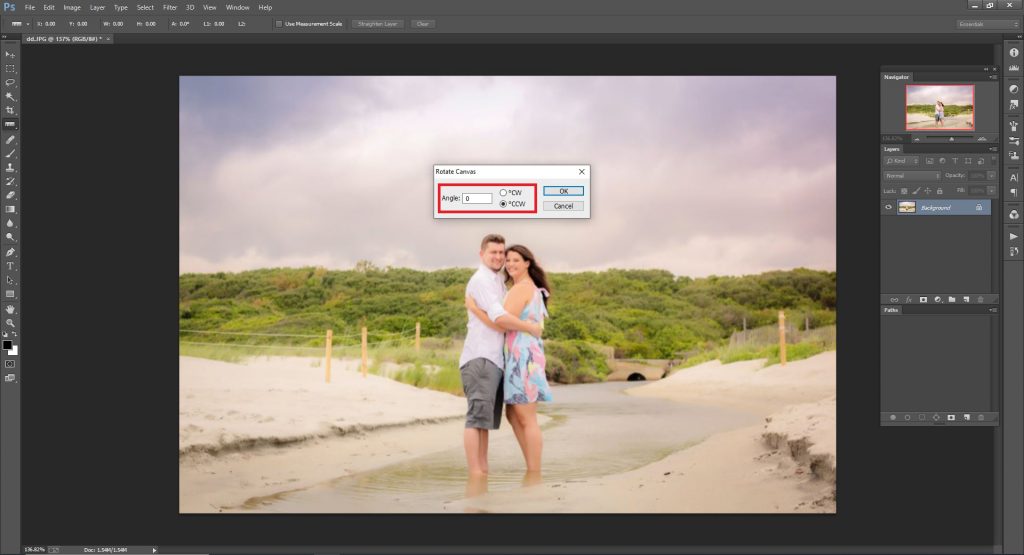
After drawing the line along the uneven surface, you have to go to the image option. In the image option, you will find the Image Rotation option. Select image rotation and you will find an option named Arbitrary. Select this option because it will show the angle of the line drawn. It will also show you the rotation angle.

4.Rotate the image
Last, you have to click ok on the rotate canvas dialogue box. This will trigger Photoshop to rotate the image and make it straight.

5.Cropping the image
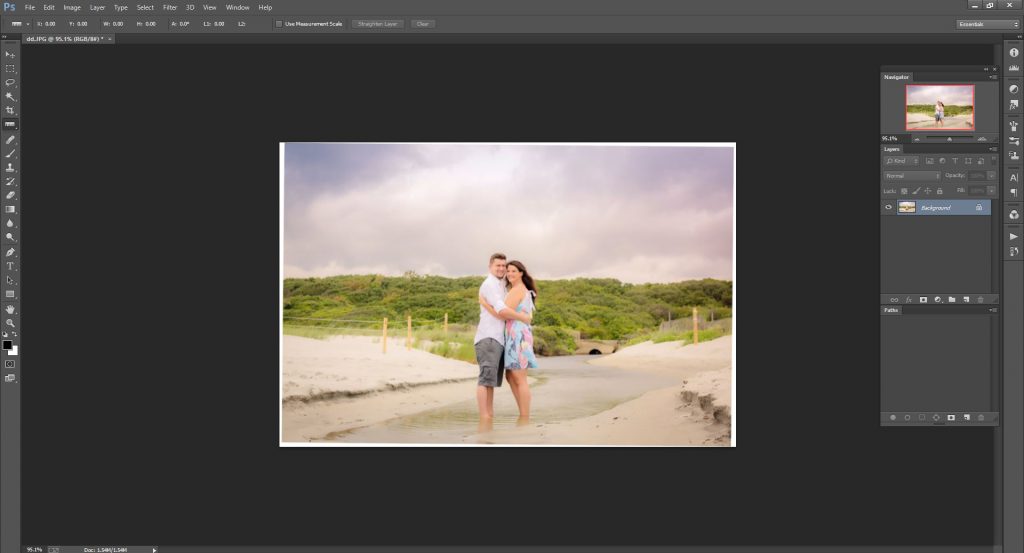
Due to rotation inside the window, you will notice some white spaces around the corner of the image. It would help if you cropped those white areas using the crop tool. You can select the crop tool by pressing c on the keyboard or from the toolbar. After selecting the crop tool, you can drag the four corners to adjust and choose areas you want to keep. After selecting, you have to click enter or click on the Move tool to apply crop on your image. This will give you a perfectly straight image.

Conclusion
There are some other ways to straighten an image. But using a ruler tool for this is the best way. We encourage you to discover and learn different techniques to straighten an image. I hope this tutorial is helpful for you.
If you want to know more then visit our website services.


